Listing Cards
By task, owner, and status.
Cards
Information and tasks related to your clients are stored on cards. More cards can be added to the same client.
Listing cards is possible by owner and status. You can set a filter based on optional fields or you can choose from the listed fields as well.

Grouping by tasks
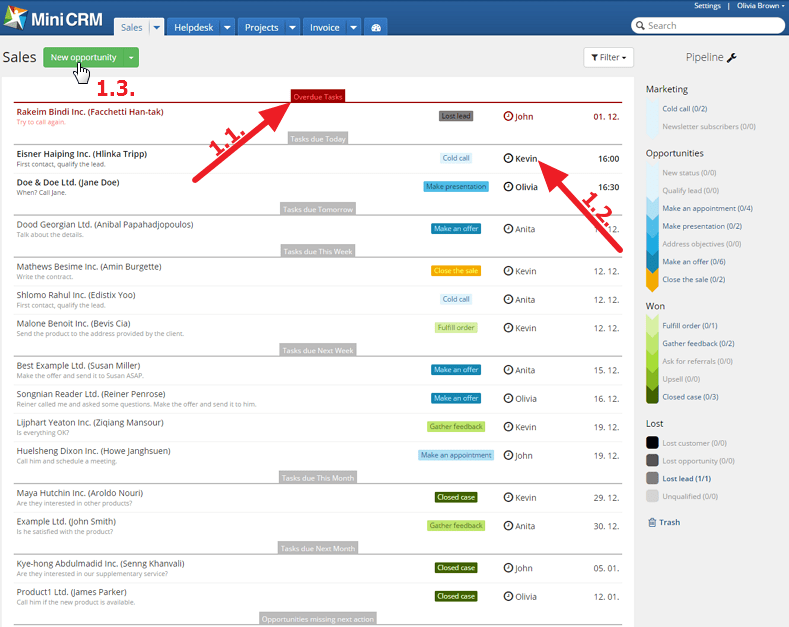
Cards are grouped by the deadline of tasks [1.1.]:
If there is enough space on your screen, the owner’s name is displayed as well [1.2.].
To add a new card, click on the [New…] button [1.3.]. Later you can load and edit the card by clicking on its name on the list.
Owner
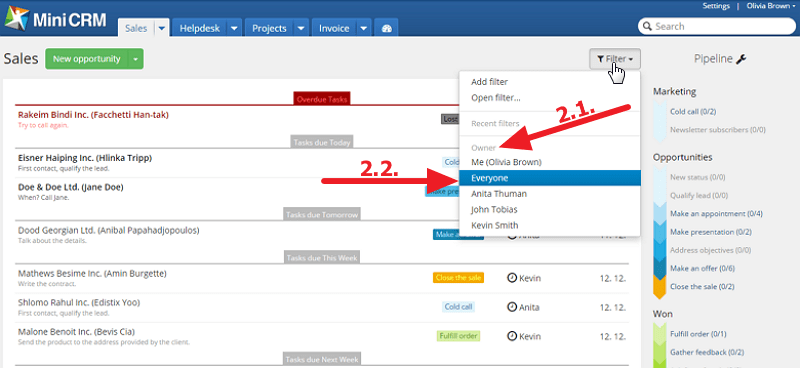
To display the cards of a selected Owner [2.1.], click on the [Filter] button. In that case, those cards are displayed as well on which a task is assigned to the user.
By selecting the [Filter] > Owner > Everyone option [2.2.], all cards are displayed. This is the default filter setting.
Pipeline
There can be 3+1 groups of statuses. Cards can be moved between and within these statuses. Groups and statuses are customizable.
For more information, see: Customizing Statuses (processes)
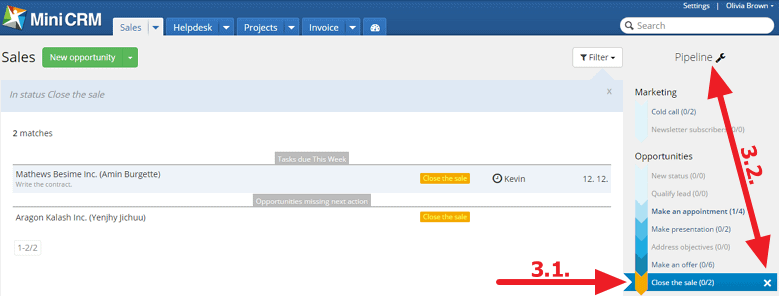
If you click on a status [3.1.], only those cards appear on the list that belong to the selected status. You cannot select and filter empty statuses.
You have to create a filter for advanced filtering.
For more information, see: Filters
If you click on Pipeline or on X [3.2.], next to the selected status, all cards are displayed that can be found in the module. This is the default filtering setting.
In the brackets next to statuses you can see the number of cards with overdue tasks [3.3.] and cards of the given status [3.4.].

Listed fields
To list fields, you have to create a new filter or load a saved one.
For more information, see: Filters
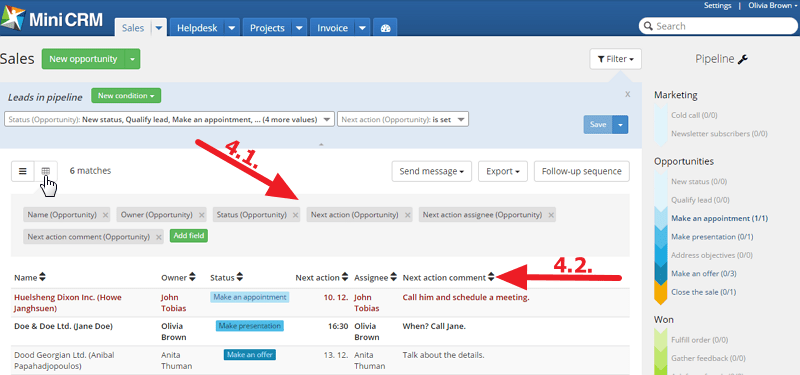
If you click on the Grid view icon, that appears when starting a filter, the list view is replaced by a grid view. In that case only 6 fields are displayed (the ones that were added first) [4.1.]. The fields added later are only displayed in the exported table.
You can change the order of fields by using the drag and drop function. If you drop the field in the required place, the table is updated and the columns are displayed according to the new order.
If you click on the arrow next to fields, the list will be arranged according to that field [4.2.].
Since listed fields appear during exporting and sharing as well, it is possible to create Google Spreadsheets in which data, stored in MiniCRM, is updated automatically.
“(Company) data shown in pictures were only created for testing.”