Opportunities and todos
Listing opportunity pages
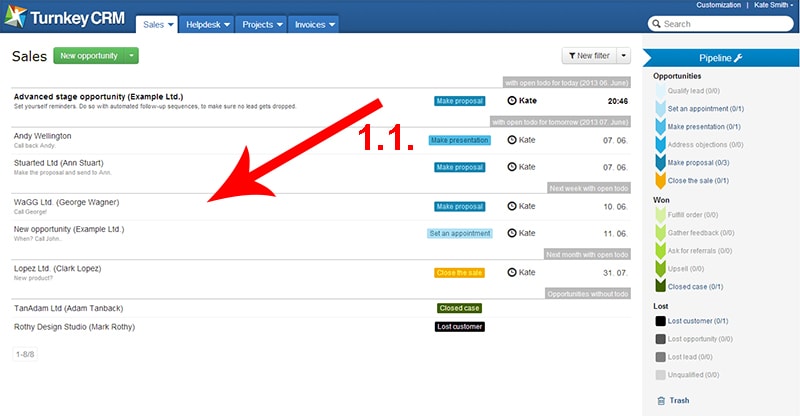
In our Turnkey CRM system we record the opportunity related information, todos andrelevant information on the opportunity pageswithin each module. In our system a single opportunity may have multiple opportunity pages.
For more information on listing the opportunity pages please go to
Listing opportunity
pages. [1.1.]
Add new opportunity page
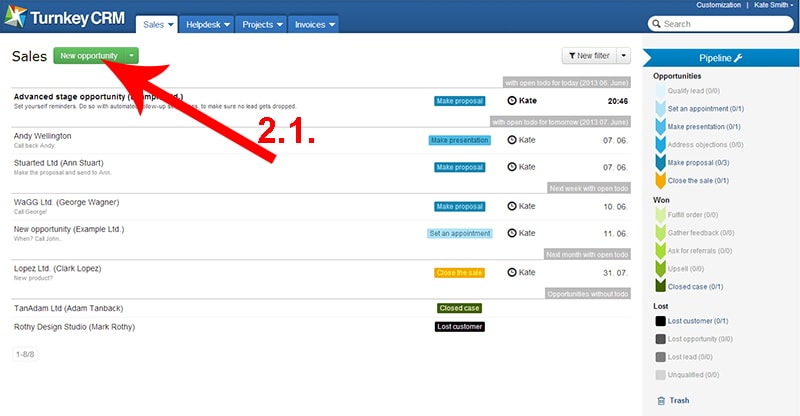
We can add new opportunity pages by clicking on the [New …] button**[2.1.]** located on the top of the opportunity page list in all modules, with a different title in each module.
For more information on the steps of adding a new opportunity page please go to Add new opportunity.
Opportunity page setup and application
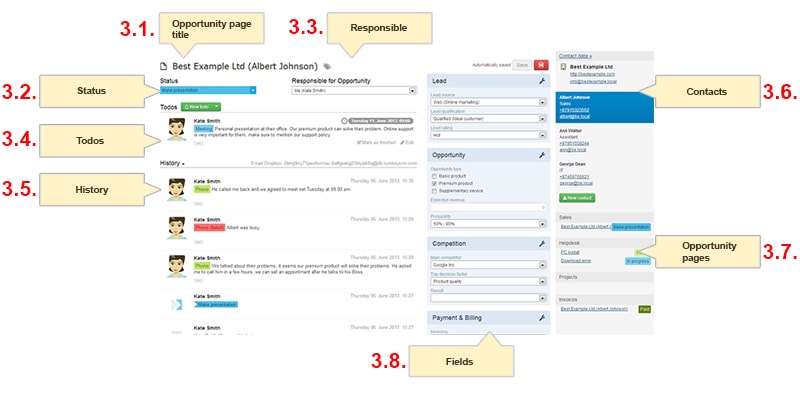
We can load the opportunity page of our relevant opportunity –which is subject to viewing or editing- by clicking on the title of the selected opportunity page. The opportunity page in all cases consists of 6 parts:
- Opportunity page title [3.1.]
- Status [3.2.]
- Responsible [3.3]
- Todos [3.4.]
- History [3.5.]
- Contact [3.6.]
- Opportunity pages [3.7.]
- Fields [3.8.]
Opportunity page title [3.1.]**
Depending on which opportunity the opportunity page was set to, the title of the opportunity page as a default setting shall contain the followings:
- In the case of companies with a contact person: Company name (Default contact person name)
- In the case of a company without a contact person: Company name
- In the case of a private individual: Surname and first name of the person (opportunity)
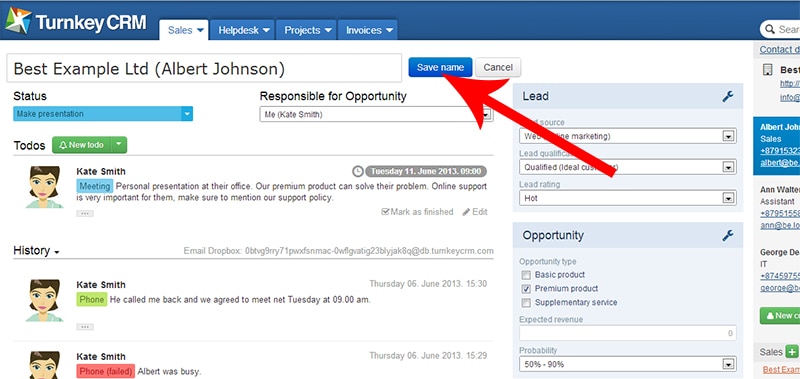
As - in each module – during the listing of the opportunity pages the title of the opportunity page is displayed in the list, their name can be modified in accordance with our requirements at any time. For this it is enough to click on the title of the respective opportunity page, and after the completion of the required modification to click on the [Save name] button.
Status[3.2.]**
The status field indicates the current status of the opportunity page. Namely in accordance with the scope of authority of the colleague responsible for the given opportunity page the opportunity page is in a status defined here.
If we wish to change the status of the opportunity page, after dropping down the field we can select the appropriate one among the statuses offered by the system.
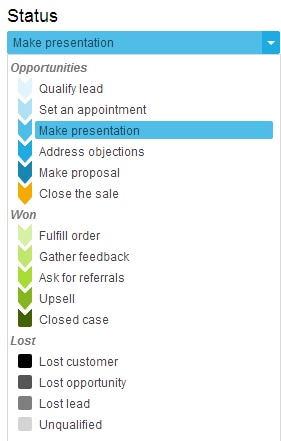
For more information on statuses and details on their customisation please go to Statuses.
Responsible [3.3.]**
We can assign a responsible – from our colleagues- to each opportunity page, namely a contact person. This is assignment can also be automated. The name of this useris indicated belows.
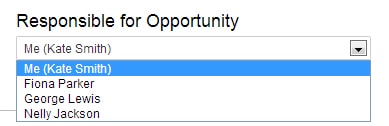
Depending on the authorisation of the responsible, there might be users within our system, who can only access their own opportunity pages, and some may access other opportunity pages too. Opportunity pages, which are not designated to any users, are visible to everyone in order to avoid ignoring any opportunity pages.
For more information on users eligible for responsible, the respective authorisation and their settings please go to Users.
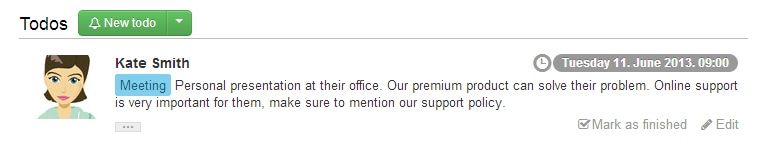
Todos [3.4.]**
The activities,which are required for achieving our goals, will be included among our todos. Todos are a task, which need to be sorted, namely each open todo has a deadline.It is recommended to add such todos here, which can be done in a short time.
For more information on setting a new todo and on the modification of existing todos please go to Setting, editing and closing a todo.
History [3.5.]**
The History section contains all past events,which have already happened and we have no further todos in relation with them, namely no deadline is set here.Also the todos set as finished are listed here, based on which the related client history is step by step drawn up on the opportunity page. For more information on this please go to Setting, editing and closing a todo.

Client history also includes the followings, related to the opportunity page:
- marketing-resource data,
- status changes,
- responsible, opportunity page title and field value modifications,
- sent e-mails and text messages,
- archived e-mails,
- file uploads via the file type field(s).
Also the name of the respective user is indicated at the given logs, thus it is always visible who, when and what done before. In the case of logs, whereby the action was carried out by the system, Turnkey CRM title is indicated. For example in the case of subscription via opportunity page, data modification link or web-forms, and/or data modification by API, automated or mass e-mail or text message sending, furthermore e-mail archiving.
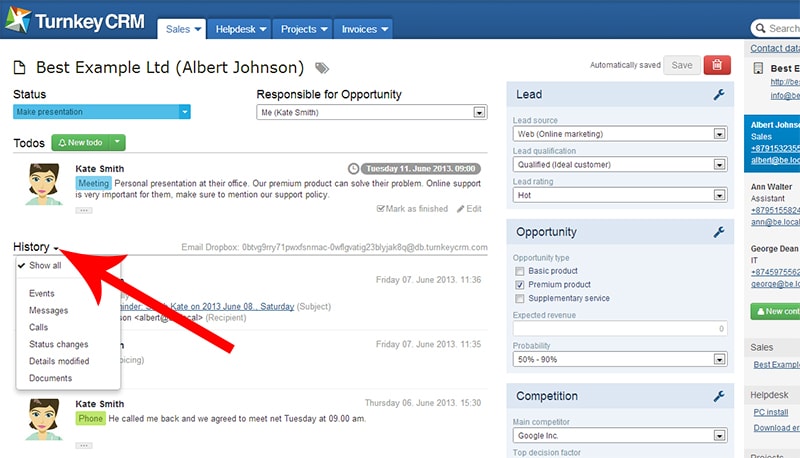
As a default setting among the history of the given opportunity pages all comments are listed, however if it’s required this list can be narrowed down by clicking on the arrow located next to the History caption, by selecting any of the below elements subject to be listed:
- Events: In this case exclusively the closed todos are displayed in the history.
- Messages: The list only includes the already sent e-mails, text messages and archived e-mails.
- Status change: The history only includes the status changes related to the given opportunity page.
- Opportunity page change: In this case the responsible, opportunity page title and filed value modifications are listed only.
- Documents: In this case only the file uploads carried out via the file type field(s) can be seen, namely the closed todos, which already have an attached file.
Contacts [3.6.]**
The opportunity page is used for indicating contacts, namely the contact details of the company and persons,who we will be in contact with in the future. In browser screens wider than 1200 pixel these are indicated on the right side, in the 3^rd^ column of a 3-coloumn opportunity page; in the case of a smaller browser display in the 2^nd^ column of the 2-coloumn opportunity page above the fields.
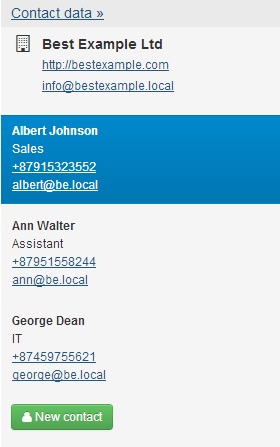
Here by clicking on the company or contact person’s name via a simple web-form we can indicate or modify all data, which might be important for keeping in touch. Thus we can easily make a phone call or send an e-mail to the selected e-mail address.
In the case of persons the default contact person of the opportunity page appears with a blue background. This means that the given opportunity page belongs to the marked person. The default contact person can also be retrospectively added and indicated or modified on the opportunity page by placing the cursor above the name of the selected person and by clicking on the tick appearing in front of the person’s name.
For more information on contacts and editing contact details please go to Contacts.
Opportunity pages [3.7.]**
Under Contacts we can view all the opportunity pages related to the given opportunity listed by modules, and also their statuses.
By moving the cursor to the title of the given module and by clicking on the + symbolwe can add a new opportunity page to the opportunity under the displayed module.

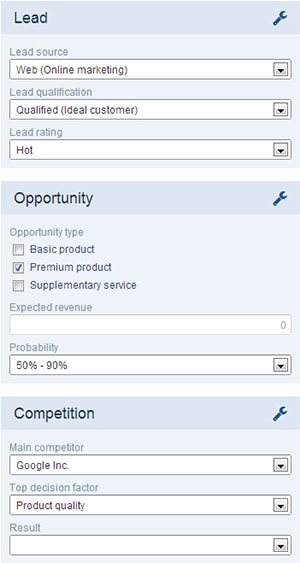
Fields [3.8.]**
Fields are used to store key information related to the opportunity that you wish to use during the sales process and/or later on to:
- create reports and stats
- filter and group the opportunity pages and opportunities.
For more information on the field types subject to be placed on the opportunity pages and on their customisation please go to Opportunity page fields.
Setting, editing and closing a todo
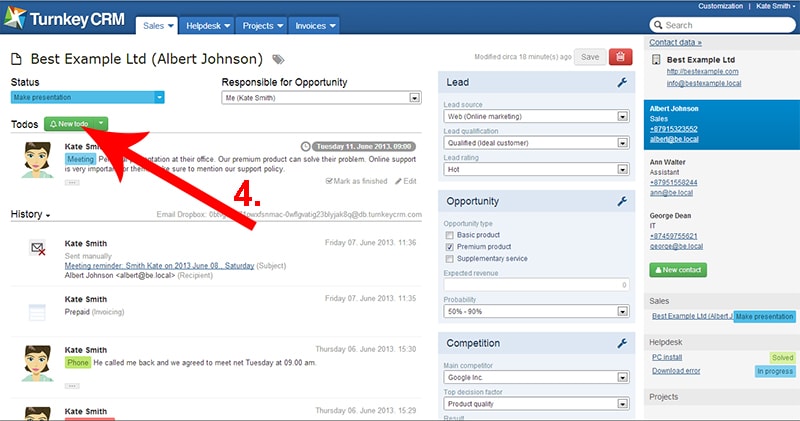
Todos related to our opportunities and passed events are recorded on the opportunity page.
New todos or history can be set by clicking on the [New todo] button [4.]on the respective opportunity page.
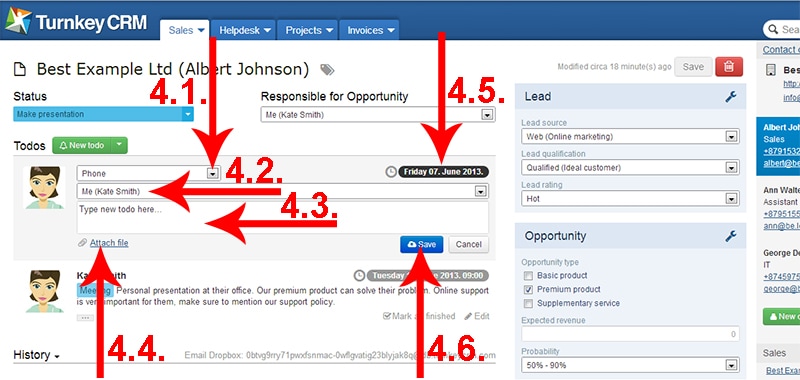
Todo type [4.1.]**
Todos can be added without indicating the type, or we can choose a type from the below 4 options:
- Phone
- Unsuccessful phone
- Personal
- Correspondence
Todo responsible[4.2.]**
We can select the responsible of the todo from the users listed in the system, depending on to whom the given todo is assigned. As a default setting the system sets us as the responsible.
Todo text [4.3.]**
In the empty field the details of the given todo are indicated.
It is compulsory to add a textto a todo, but make sure that only net information (valuable piece of information)is added. Always write a clear statement, which focuses on the point in order to ensure that later on when we or our colleagues manage the todo, they are clear on the past event.
Attach a file[4.4.]**
We can attach documentsto each todo. Click on the Attach a file(paper-clipicon) located at the left bottom corner of the text field of the todo, which is currently being edited, and select the file to be attached in the pop-up window.
The uploaded documentwill always be accessiblein our system under the open todos and history,and if required during the editing of the todo by clicking on the recycling binicon, behind the file it can be removed at any time.
Deadline [4.5.]**
When selecting the deadline of the todo we can choose from the preloaded values or we can also set a specific date and time. The deadline can be edited without editing the todo, in the todo list by clicking on the date.
Please indicate the date in the pop-up calendar, and the exact time in the time field. By clicking on the [OK] button the values are displayed under the deadline. If we wish to modify this retrospectively, please click on the calendar icon.
When any of the opportunity related todo’s deadline expires, the title of the opportunity page appears highlighted in the opportunity page list.This shows us that on the given day which opportunities have due todos.
Setting a todo [4.6.]**
After setting the Responsible and Deadline,furthermore filling out the Note field, click on the [Save] button and the added todo will be visible on the opportunity page, under the Todoslist.
Edit a todo [4.7.]**
We can edit the already set todos at any time by clicking on the Editcapture of the given todo.
We can edit multiple todos on the same opportunity page. It is also possible to edit and close todos, when there are unfilled fields on the opportunity page. While we are editing the todos we can also make changes to the opportunity page.
The colleagues –depending on their authorisation – may also modify the todos of each other.
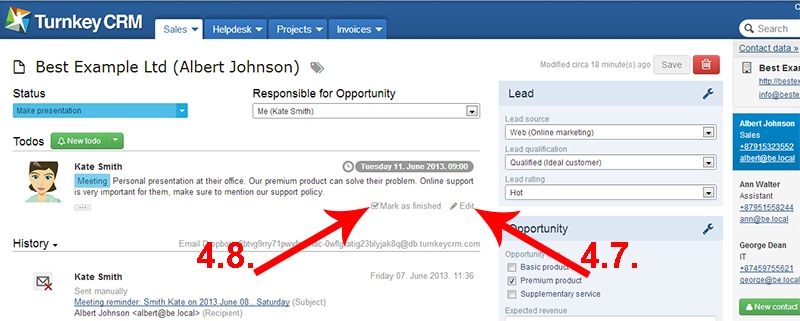
Closing a todo [4.8.]**
Once a todo is completed, it has to be closed. To close a todo please click on the Close capture.
Once a todo is marked as finished (namely we have clicked on the Close capture), it is immediately moved to the Historysection of the page. Todos marked as finished cannot be modified retrospectively.
Every time a todo is finished, make sure to set a new todo with a future deadline to maintain a healthy business flow. This way we will surely not forget about this opportunity.
It is recommended to agree a next date and time to call or meet the opportunity and to send a confirmation e-mail about the agreed date and time. With the help of the CRM system it’s easy to keep our promise.
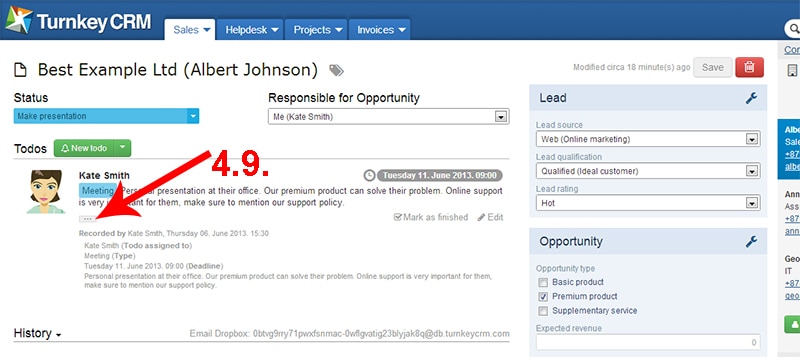
View the History of the todo and its modifications [4.9.]**
By clicking on the Modifications […]icon of a set (open or closed) todo we can list the entire history of the given todo. We can view all information related to setting the todo and all modifications made to the todo.
Application of todos via a concrete example
Our colleagues can be delegated todos automatically within the Turnkey CRM system, and/or everyone can add new todos for themselves or to their colleagues, depending on their authorisation.
Todo application
Let’s suppose that our colleague, Attila Kiss automatically received a phone type todo. His task is to call our opportunity. The deadline of the todo is today; therefore the Turnkey CRM is indicating to us that there is a todo pending with this opportunity.
If we could not reach the opportunity, or he/she had no time to talk to us, or we have not managed to contact the required person, we need to set a new todo, list the net information in relation to the history of the todo in the empty field, and click on the [Todo finished] button. This todo will be listed under the History section and as a result on the respective opportunity page the related opportunity history will be continuously drawn up under the History section of the page.
After this we need to modify the already existing todo and set the todo in a way that the opportunity needs to be called tomorrow.
If we are unable to talk to the opportunity next day, close the todo. Click on the todo and complete the field content with the net information related to the closure of the todo and click on the [Todo finished] button.
If the opportunity says that he/she is unable to talk to us today, but he/she would like to get a call back tomorrow, but tomorrow Attila Kiss is off, so our other colleague, Katalin Nagy can easily take over the todos of Attila and she can call the opportunity next day.
Replacement of a colleague
If the todo has been set by one of our colleagues, but we are doing the task, after closing the todo by double-clicking on the [Todo finished] button the system – after approval- will automatically set us as the responsible of the closed todo.
Tag management
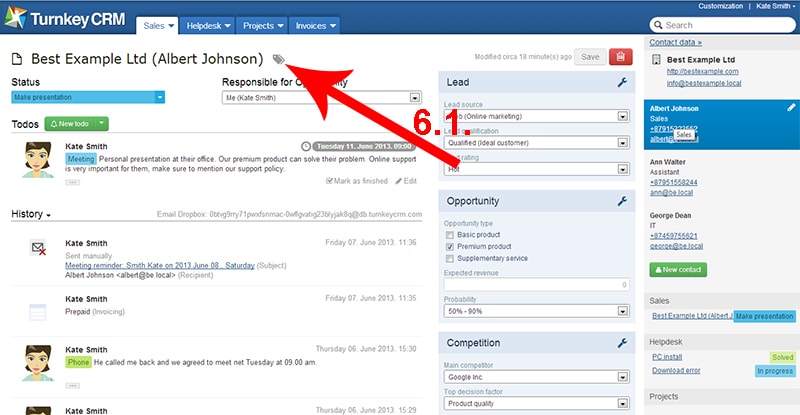
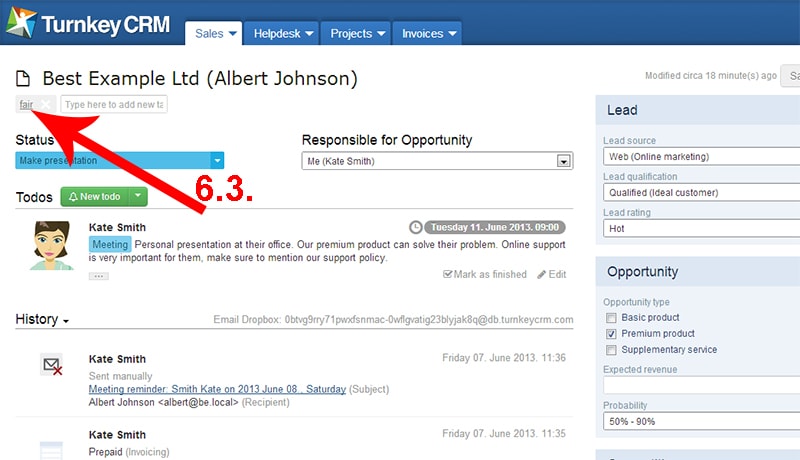
On the opportunity page we can also add tags to our opportunities. With the help of the tags we can easily characterise our opportunities and by using filters we can segment them.
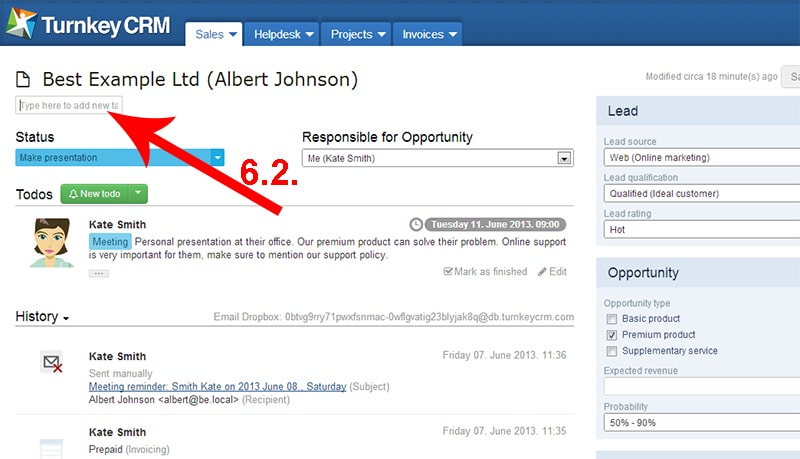
To add a new tag please click on the Tag icon [6.1.]located next to the name of the opportunity page and type in the tag title in the field appearing under the name [6.2.]. After this click outside the field and the new tag is added to the respective opportunity [6.3.]. The added tag from this point on will be visible on all opportunity pages of the given opportunity.
For more information on the management of tags please go to Tag management in the Turnkey CRM.
Archiving e-mails related to the opportunity page
Each opportunity page in the Turnkey CRM has an individual Opportunity page e-mail address [7.1.].

We can archive our e-mails related to the given e-mail address by forwarding them to the e-mail address, therefore in the future these e-mails will always be together at the same place, on the opportunity page of the given opportunity under History.
For more information on archiving e-mails please go to Archiving e-mails.
Delete an opportunity page
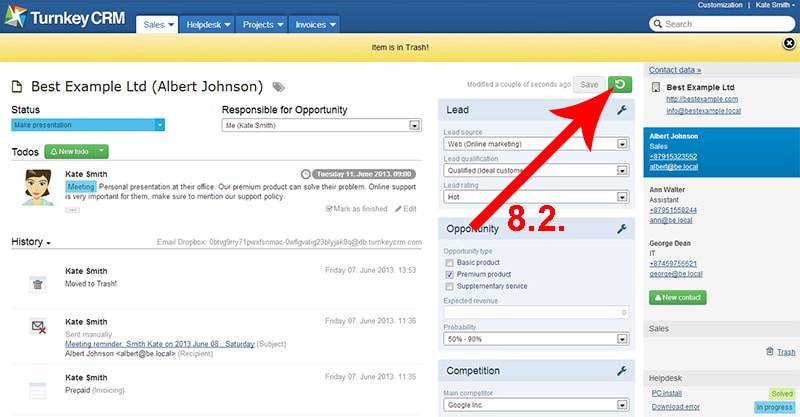
If an opportunity page is no longer required, click on the name of the required opportunity page in the list and on the uploaded opportunity page by using the Move to the recycling binicon, located next to the [Save] button move the opportunity page to the Recycling bin [8.1.].
Later if we still need the opportunity page, it is enough to click on the name of the given opportunity page in the Recycling bin,and click on the given opportunity page on the Restore from the recycling binicon [8.2.]located next to the [Save] button.
„The (company) data indicated on the pictures used for the Help menu is non-existing data created only for testing purposes.”